Chromatic Solfege Hand Signs: A Practical Guide
You hear a melody once and can sing most of it back. Then one note throws you off.
It isn’t part of the plain major scale. It bends upward or slips downward. Maybe it’s a passing tone, maybe a bluesy color note, maybe a chord tone from a quick key change. You know it matters. You just can’t hear it clearly enough to name it.
That’s where chromatic solfege hand signs become useful. Not as a classroom trick. Not as something to memorize for its own sake. As a practical ear training tool that helps you stop guessing and start hearing those in-between notes with more accuracy.
If you want to play by ear, sing in tune, recognize altered notes faster, or build stronger pitch memory without chasing perfect pitch myths, this method gives you something physical to attach to sound. Your hand shows your ear where the note lives.
Table of Contents
- Why Your Hands Might Be the Key to Your Ears
- Connecting Pitch to Movement with Solfege
- The 7 Foundational Hand Signs You Must Know
- How to Form the Chromatic Hand Signs
- Practical Exercises to Train Your Ear Daily
- Teaching Tips and Common Mistakes to Avoid
- From Signs to Sounds to Musical Freedom
Why Your Hands Might Be the Key to Your Ears
Some notes are easy to hear as stable. Others feel slippery.
Beginners often hear the main scale tones well enough, but the altered notes are harder. A raised note can sound tense without feeling identifiable. A lowered note can sound expressive, but vague. When that happens, the ear needs more than theory words. It helps to give the note a shape and a place in space.
That’s the power of hand signs. You’re not only hearing pitch. You’re seeing it and feeling it.
A physical anchor for hard-to-hear notes
When you attach a hand shape to a syllable, your brain gets more than one cue. The sound has a name. The name has a gesture. The gesture has a height. That makes it easier to track melodic direction and hold onto pitch as it moves.
Practical rule: If a note keeps slipping away in your ear, give it a syllable and a hand sign before you try to analyze it.
This idea has deep roots. Chromatic solfège hand signs are an extension of the Curwen and Glover system, which traces back to Sarah Glover’s Norwich Sol-fa in the 18th century and was later expanded in the 19th century by John Spencer Curwen. Curwen paired hand positions with solfège syllables to create a visual-spatial ladder for pitch, as described in this overview of Curwen and Glover hand signs.
That history matters because it reminds us this isn’t a fad. Teachers have used this approach for a long time because it turns pitch into something tangible.
Why this helps ear training
If your goal is ear training, the benefit is simple. Hand signs slow down random guessing.
Instead of hearing a mystery note and hoping your voice lands correctly, you place it in relation to other notes. Higher. Lower. Sharper. Flatter. Closer to home. Pulling away from home. That’s the beginning of real listening.
If you already do interval drills, scale practice, or dictation, you can pair this approach with a dedicated functional ear training app and use hand signs to make the sounds stick more firmly.
Connecting Pitch to Movement with Solfege
Before chromatic notes make sense, the basic ladder has to feel solid.
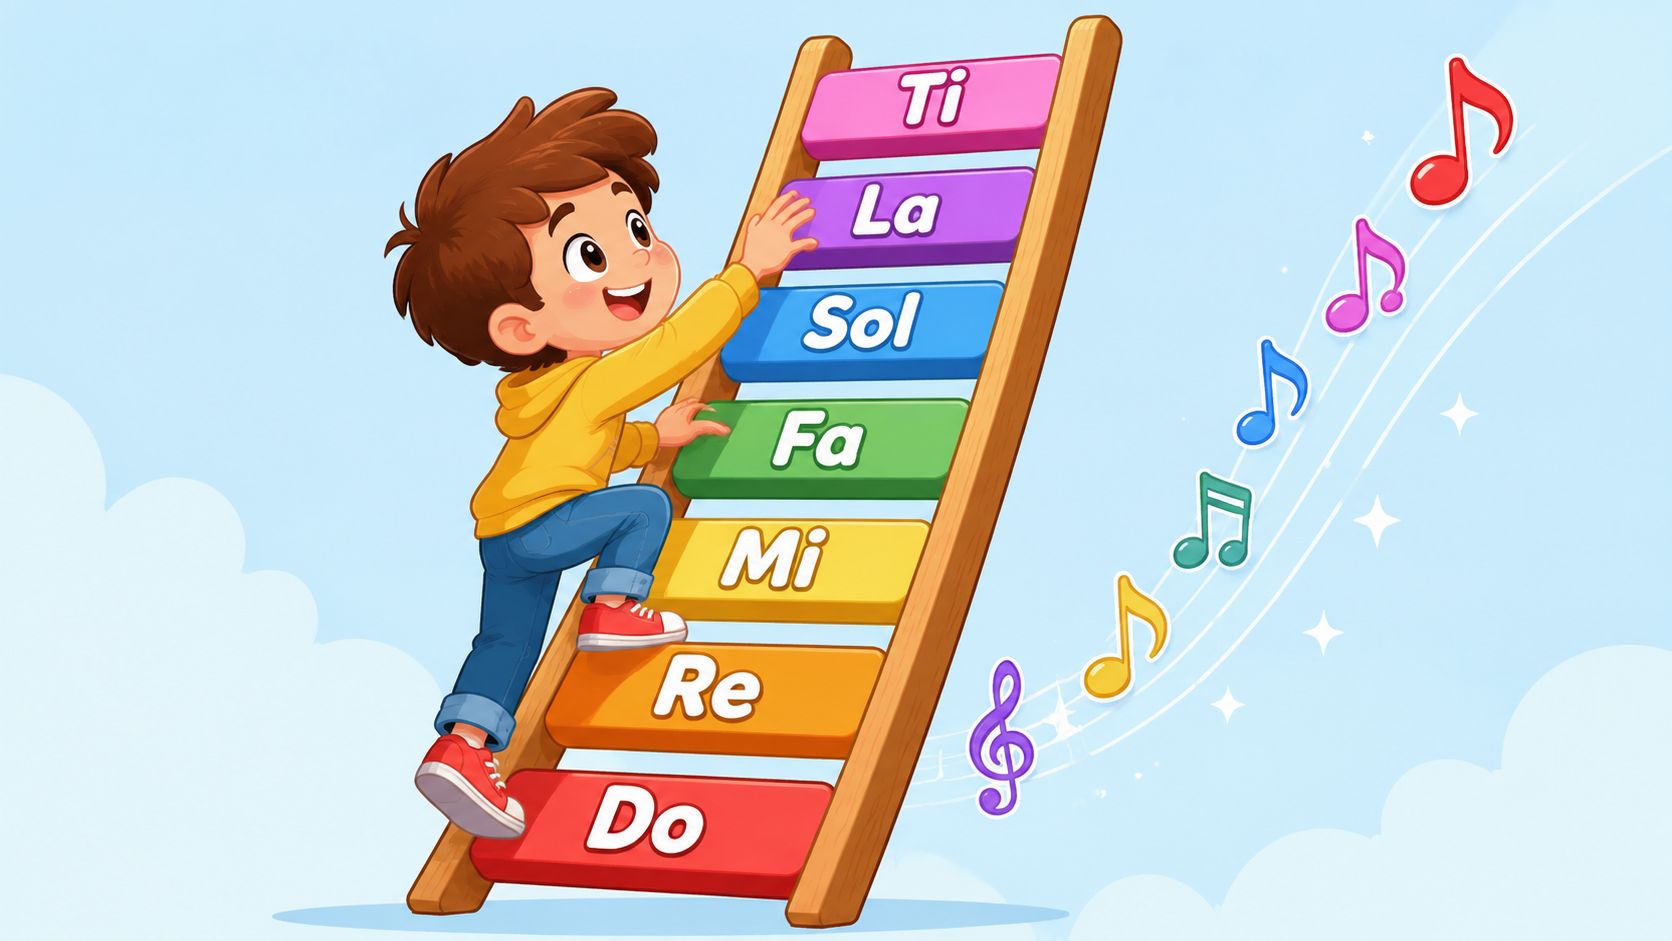
Solfege gives the main notes of the scale clear names: Do, Re, Mi, Fa, Sol, La, Ti. Those names aren’t just labels for theory class. They help you hear each note as a role in the scale. Do feels settled. Ti wants to rise. Fa can feel tense. Sol often feels strong and open.
Think of solfege as a ladder
A ladder works because every rung has a fixed relationship to the others. Solfege does the same job for your ear.
If you sing Do and then Mi, you don’t just hear two notes. You hear a distance and a function. If you sing Sol down to Fa, you feel that small drop. Hand signs strengthen that process because your body starts tracing the same path your ear is learning.
Here’s the key leap into chromatic hearing. Chromatic solfège extends the diatonic syllables by assigning altered syllables to accidentals. Sharps become Di, Ri, Fi, Si, Li, and flats become Ra, Me, Se, Le, Te, giving each of the 12 tones a distinct vocal label, as shown in this chromatic solfege hand sign resource.
That means the note between Do and Re doesn’t stay vague. It gets a name. You can hear it as Di when it functions as a raised Do, or Ra when it behaves as a lowered Re.
Why different names matter
Many learners often find this confusing. They ask, “If the piano key is the same, why use two names?”
Because ear training isn’t only about pitch height. It’s also about musical meaning.
- Di usually feels like Do moving upward.
- Ra usually feels like Re lowered from above.
- Fi has a different pull than Se, even if they can land on the same key in equal temperament.
Those differences matter when you’re trying to sing in tune, hear harmony, or transcribe music by ear.
One pitch can have more than one job. Solfege helps you hear the job, not just the keyboard location.
If you skip that step, chromatic notes stay blurry. If you train it daily, they start sounding intentional.
The 7 Foundational Hand Signs You Must Know
If the basic signs feel clumsy, the chromatic ones will feel even harder. Start with the core set until each gesture feels automatic.
The physical map matters as much as the hand shape. In common classroom use, the signs move upward with pitch. Low Do sits near the waist, higher notes rise step by step, and upper Do reaches above the head. That vertical logic is what turns hand signs into an ear training tool instead of random motions.
The basic map from Do to Ti
Use one steady tempo and sing slowly while you form each sign.
- Do. Your home base. Place it low, around waist level. Think stable and grounded.
- Re. Slightly above Do. It should feel like motion has started.
- Mi. Around mid-chest. This often feels warmer and more settled than Re.
- Fa. In many teaching materials, this sign includes thumbs down. The shape helps mark its more active, leaning quality.
- Sol. Often around shoulder level. Strong and open.
- La. Commonly shown as a curved palm. It often feels lighter than Sol.
- Ti. Near the forehead. It should feel unfinished, like it wants to rise into Do.
Then sing upper Do above the head. That completes the ladder.
What each sign teaches your ear
These aren’t just memory tricks. Each sign teaches a listening habit.
| Syllable | What to hear | What to feel |
|---|---|---|
| Do | rest | home |
| Re | movement | stepping upward |
| Mi | calm brightness | gentle arrival |
| Fa | tension | leaning |
| Sol | strength | balance |
| La | openness | lift |
| Ti | pull to Do | almost there |
If you want a fuller guide to scale hearing, this article on music theory scales and ear training pairs well with hand-sign practice because it helps connect the body map to the sound of real scale degrees.
A simple test
Sing Do, Mi, Sol, Mi, Do with signs.
Then do it again with your eyes closed. If you still feel where each pitch sits, the system is working. Your ear is starting to organize sound spatially, not just verbally.
How to Form the Chromatic Hand Signs
The chromatic system works best when you keep the diatonic sign in mind and then show how the note has changed.
That’s why chromatic solfege hand signs are easier than they first appear. You aren’t learning a completely separate language. You’re learning how to adjust the base sign so your ear can hear “raised” and “lowered” notes in context.
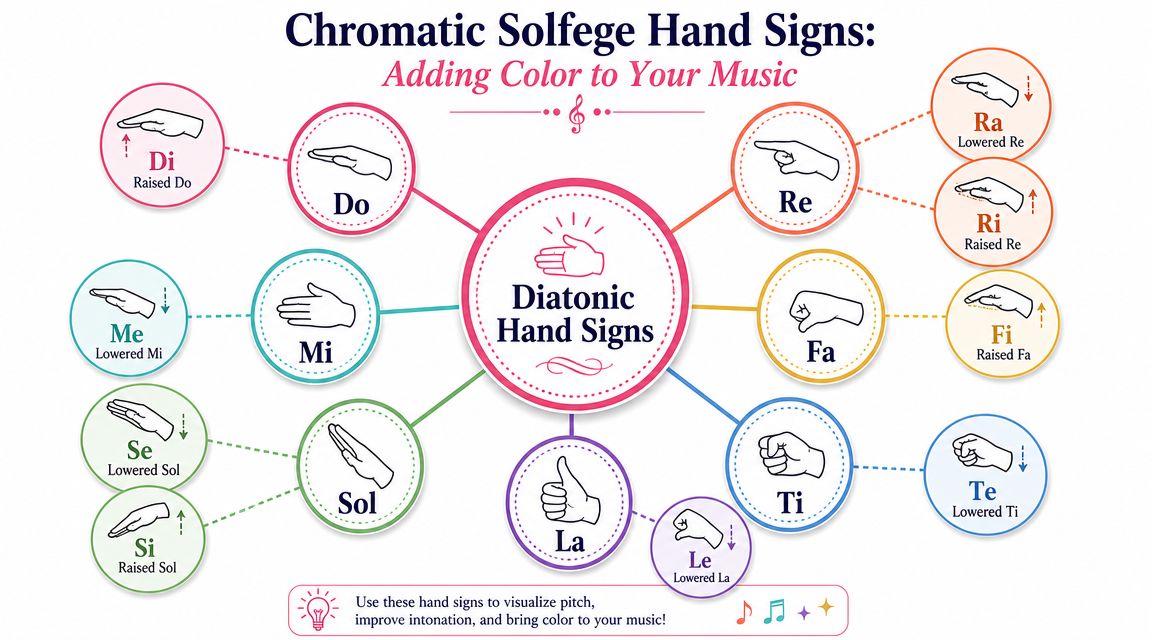
Modern classroom resources often go beyond the basic octave and use 18 signs to cover raised and lowered notes, not only the standard 8-note diatonic scale, as shown in these chromatic solfege handsign posters. That expansion matters because it gives singers and performers a physical way to encode the full chromatic palette.
The basic logic of altered signs
The simplest way to think about them is this:
- Sharps usually feel like a lifted or intensified version of the base note.
- Flats usually feel like a lowered or softened version of the neighboring scale degree.
- The base identity still matters. Di still belongs to Do. Me still belongs to Mi.
That last point is where students often get mixed up. They see the altered note as a brand-new island. It isn’t. It’s a changed version of a familiar place.
The common altered syllables
Here are the syllables most singers learn for common chromatic notes:
| Type | Syllables |
|---|---|
| Raised notes | Di, Ri, Fi, Si, Li |
| Lowered notes | Ra, Me, Se, Le, Te |
Try saying them slowly before you sing them. Notice the vowel color. The sharp syllables often feel brighter. The flat syllables often feel darker. That contrast can help your ear lock into the note’s direction.
A good demonstration helps when you’re first learning the shapes. This video shows how singers use the gestures to reinforce contour and intonation:

Where confusion usually shows up
Most learners stumble in three places.
-
Di versus Ra
They may land on the same piano key, but they don’t do the same job. Sing Do Di Re, then Do Ra Do. The pull feels different. -
Fi versus Fa
Fi isn’t just “Fa but higher.” Hear it as an altered scale degree with its own function. -
Descending flats
On the way down, singers often let pitch sag. Hand signs help because they keep the body engaged with direction, not just the target note.
On descending chromatic lines, think upward energy even while the melody moves down. That helps preserve pitch center.
If you can form the sign while singing the syllable, you’re training more than memory. You’re building a reliable path from hearing to naming to reproducing the note.
Practical Exercises to Train Your Ear Daily
Knowledge becomes skill when you repeat it in short, focused practice.
You don’t need a long session. 10 minutes a day is enough to make chromatic solfege hand signs useful if you stay consistent and listen carefully. The point isn’t speed. The point is accurate hearing.
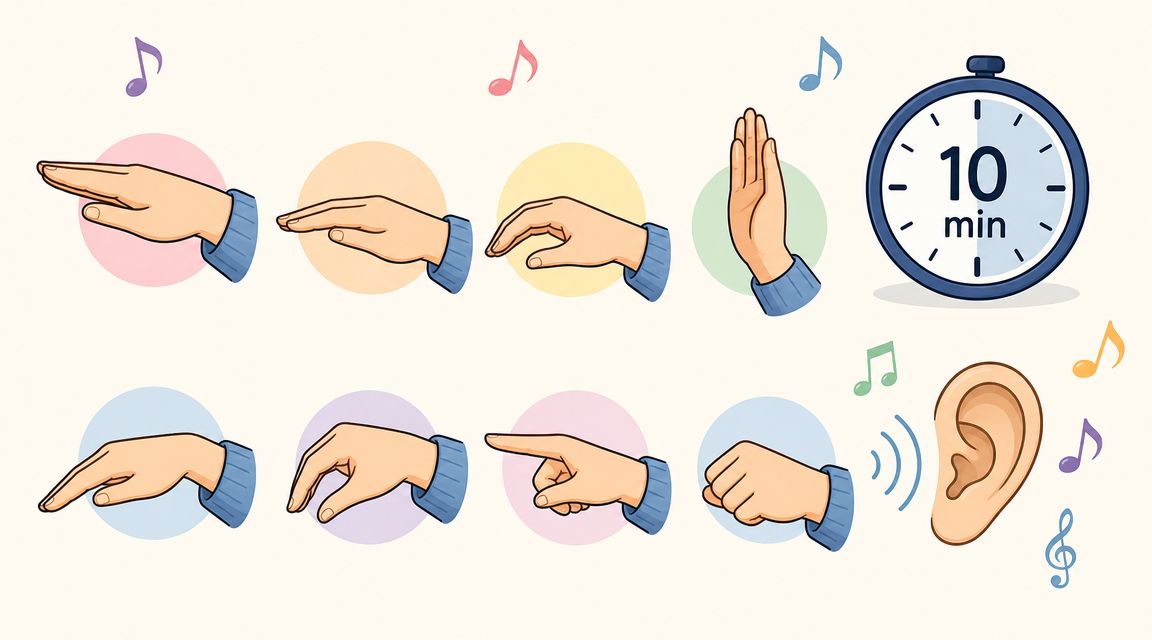
Training materials on chromatic hand signs emphasize that the gestures provide spatial encoding. That helps singers track melodic contour and intonation because the movement reinforces interval size and direction, which supports pitch stability and pattern recognition in ear training work, as demonstrated in the earlier linked video.
A 10-minute daily routine
Try this sequence for one week before changing anything.
-
One minute of steady Do Re Mi Sing the plain scale up and down with signs. Keep the tempo calm. Focus on clean height differences between each sign.
-
Two minutes of chromatic ascent Sing Do, Di, Re, Ri, Mi, Fa, Fi, Sol, Si, La, Li, Ti, Do. Don’t rush. If one altered note feels fuzzy, stop there and repeat only that small section.
-
Two minutes of chromatic descent Sing Do, Ti, Te, La, Le, Sol, Se, Fa, Mi, Me, Re, Ra, Do. Descending is where many ears lose center, so this part matters.
-
Two minutes of mini patterns Try short cells like Do Di Re, Mi Me Re, Sol Si La, La Le Sol. Repeat each pattern until it feels recognizable, not random.
-
Three minutes with real music Pick a melody with one or two altered notes. Pause after each phrase and trace it with signs before you play or sing it again.
Use signs while doing ear training
Hand signs work especially well when paired with interval and melody drills.
- For interval practice: Sing the first note with its sign, then the second note with its sign. Feel the distance in your arm as well as your ear.
- For melodic dictation: Trace the contour in the air before writing anything down.
- For singing warmups: Add one altered note into a familiar pattern instead of running only plain scales.
- For playing by ear: Before touching your instrument, try to solfege the line with signs once.
Try this: If you miss the same note three times, stop naming letter notes. Go back to solfege and hand signs until you can hear the function.
You can also build this into a daily ear training routine so the habit stays consistent. The exact tool matters less than the pattern. Hear. Sing. Sign. Check. Repeat.
A practical song example
Suppose a melody goes Do, Re, Mi, Fi, Sol.
If you only think in keyboard terms, you may hear “some note between Fa and Sol.” If you use chromatic solfege hand signs, you hear something more useful. The line rises through the scale, then brightens with a raised Fa before landing on Sol. That’s easier to sing, easier to remember, and easier to find on your instrument.
Teaching Tips and Common Mistakes to Avoid
The biggest mistake isn’t forming the wrong sign.
The biggest mistake is doing the sign without really listening.
Chromatic solfege can sharpen your ear, but only if the gesture stays connected to sound. If the hand moves automatically while the ear drifts, practice turns into choreography.
What to fix first
A few problems show up again and again.
- Signs are too small. If your Do and Ti live in almost the same height, your body loses the pitch ladder.
- The hand shape gets all the attention. Learners can become visually correct and aurally vague.
- Everything is equally tense. Sharps, flats, stable tones, and leading tones should not feel emotionally identical.
- Descending lines collapse. Many singers relax too much on the way down and let pitch fall flat.
A quick correction often helps more than a long explanation. Ask, “Could you hear that note before you sang it?” If the answer is no, slow down and reduce the pattern.
When chromatic solfege helps most
Many lessons often remain too shallow. Chromatic solfege is useful, but it isn’t the whole picture.
A common teaching gap is the pedagogical tradeoff. Chromatic solfege is excellent for visualizing altered notes, but it works best as a specific tool for chromaticism, not as a replacement for function-first listening such as hearing intervals and chord tones, as discussed in this video on chromatic solfege and ear training tradeoffs.
That means:
| Use chromatic solfege when you need to | Use other ear training tools when you need to |
|---|---|
| hear altered passing tones | recognize chord quality |
| sing modulating lines | identify progressions |
| stabilize chromatic intonation | hear harmonic function |
| label semitone motion clearly | improvise from chord tones |
If a student can name Fi but can’t hear whether the chord is major or minor, the training is incomplete.
The best musicians combine methods. They hear scale function, interval distance, chord context, and melodic color. Chromatic hand signs fit into that system. They don’t replace it.
From Signs to Sounds to Musical Freedom
The primary goal isn’t prettier hand motions.
The goal is hearing music clearly enough that you can sing it, find it, remember it, and use it. That’s what chromatic solfege hand signs can support when you practice them with attention.
They help turn slippery altered notes into recognizable sounds. They strengthen your inner hearing. They make sight-singing less mysterious and play by ear work more direct. They also push back against the idea that good ears are something you either have or don’t have.
Your ear is trainable.
If you practice a little each day, the signals get clearer. You stop calling every chromatic note “that weird in-between one.” You start hearing direction, function, and color. That’s a real step toward improvisation, better intonation, stronger chord recognition, and more musical freedom, whether or not perfect pitch is part of your story.
Consistency matters more than intensity. A short daily routine, done carefully, beats occasional marathon sessions.
If you want a simple system for building these skills every day, Trill: Ear Training Daily is designed to help musicians train their ears through short practice sessions focused on intervals, chords, notes, and scales. It’s built for people who want to stop guessing, hear music more clearly, and play by ear with confidence.