How to Tune a Guitar by Ear: A Musician's Guide
You’re at a jam, someone says, “Give me a second to tune,” and your hand goes straight to your pocket.
No clip-on. Phone dead. The room is already moving on without you.
That little burst of panic tells you something useful. The problem isn’t gear. It’s that your ear hasn’t been trained yet to do a job your musicianship should eventually handle on its own.
Learning to tune a guitar by ear is one of the first real moments where ear training stops being an abstract idea and becomes practical. You’re not naming intervals for a quiz. You’re hearing tension, hearing alignment, and making a physical adjustment until the sound locks in. That’s the same listening skill behind chord recognition, improvisation, and learning to play by ear.
And no, this isn’t reserved for people with “natural talent” or perfect pitch. It’s a trainable skill. If you can learn chord shapes, you can learn this. If you give it 10 minutes a day, your ear gets sharper because you’re asking it to do real work consistently.
Table of Contents
- From Tuner Dependence to Musical Freedom
- Finding Your Anchor The Essential Reference Pitch
- Core Methods for Relative Guitar Tuning
- How to Actually Hear Pitches Correctly
- Troubleshooting Common Tuning Problems
- Your Daily Practice for Musical Freedom
From Tuner Dependence to Musical Freedom
Most players start with a tuner and stay there. That’s normal.
The trouble starts when the tuner becomes a crutch instead of a tool. A guitarist who can only play after staring at a screen is still outsourcing a basic musical decision. The note is either settled or unsettled. The ear can learn to tell the difference.
I’ve seen this shift happen in a very ordinary way. A player first learns to match one string to another. At first it feels blurry. Then one day they hear that rough, restless clash between two notes and realize they can steer it. A tiny peg turn changes the sound. The wobble slows. Then it disappears. That’s the moment they stop guessing.
Practical rule: Tuning by ear isn’t separate from ear training. It is ear training in one of its most useful forms.
That matters because the skill doesn’t stay inside tuning. Once you learn to hear whether two notes agree, you start noticing more in your playing. You hear when a bend lands. You hear when a chord voicing sounds tense. You hear when a melody note belongs.
A lot of beginners think this belongs to people with perfect pitch. It doesn’t. Tuning by ear is mostly about relative hearing. You compare one sound to another and adjust until they line up. That ability grows with repetition.
A good musician eventually wants more than “my guitar is in tune.” They want freedom. They want to pick up an instrument, join a rehearsal, work out a song, and play by ear without feeling cut off from the music unless an app or tuner gives permission.
The first independence test
If you can hear one note, hold it in your mind, and tune the next string to it, you’re already doing something deeper than mechanical setup.
You’re building:
- Pitch memory: holding a sound in your ear long enough to compare it
- Attention control: focusing on one note instead of a wash of noise
- Musical confidence: making a decision based on hearing, not hoping
That’s why this skill is worth practicing even if you own three tuners. The tuner can still be useful. But your ear should keep getting stronger.
Finding Your Anchor The Essential Reference Pitch
You’re at rehearsal. The band is ready, you hit an open chord, and something feels wrong before anyone says a word. The guitar may be tuned to itself, but if the first note you trusted was off, the whole instrument drifts away from everyone else.
That first pitch matters because it teaches the ear what “in tune” sounds like in practice. This is the first ear-training checkpoint. You are not just setting up the guitar. You are learning to recognize a stable pitch, hold it in your head, and match it on command. That same skill shows up later when you learn songs by ear, match a singer, or find notes without hunting.
Good places to get a reference
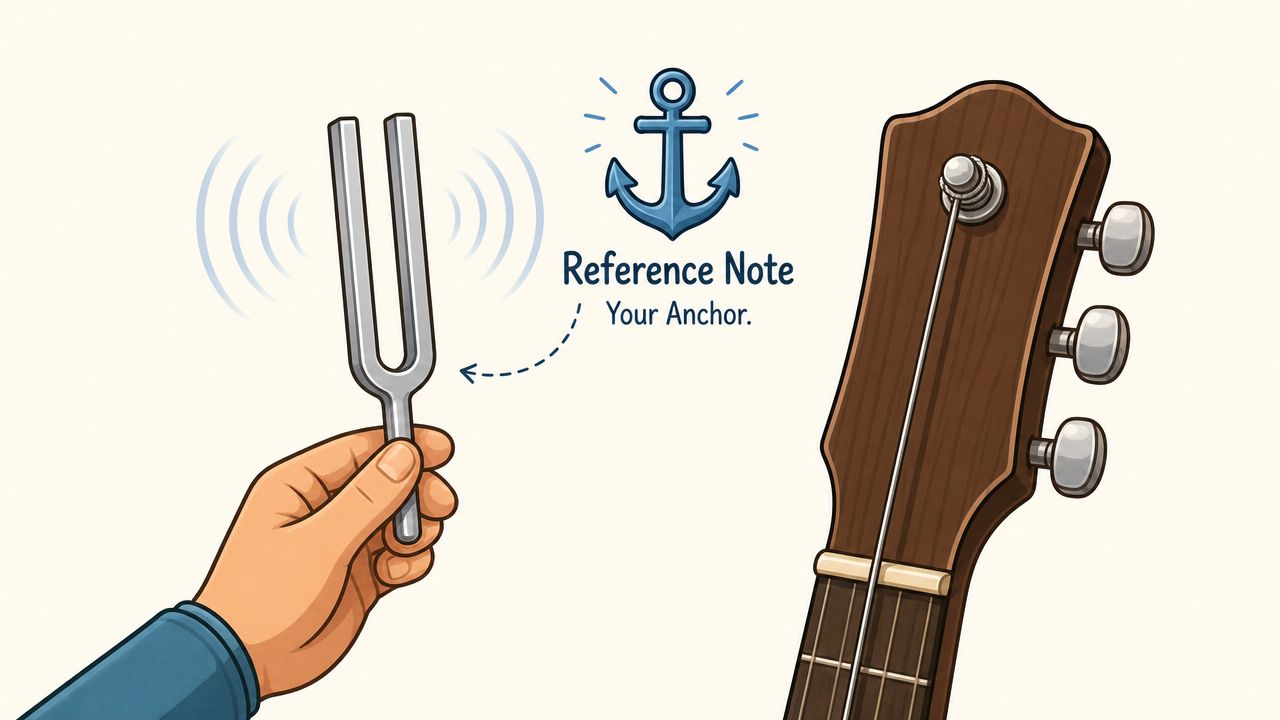
The reference does not need to be fancy. It needs to be dependable and easy to hear.
Use one of these:
- A piano or keyboard: a strong choice because the pitch is clear and sustained enough to compare.
- A tuning fork: useful if you know which note it gives you and which string you want to match from it.
- Another instrument that is already in tune: common in lessons, rehearsals, and small acoustic sessions.
- A digital tuner for one string only: still good ear work if you set the anchor with the tuner, then tune the rest by listening.
If you want the pitch side of this to make more sense, this guide to instrument tuning frequencies explains what those note names and reference pitches mean in practice.
Which string should you anchor first
Players usually start from the low E or the A string because both are convenient starting points for relative tuning. The better choice is the one you can hear clearly and repeat consistently.
For beginners, I often prefer the A string. It sits in a comfortable range, and many reference sources make it easy to find. For players who already know the fretboard well, the low E works fine too. There is no prize for choosing the “right” string. The essential skill is committing to one trustworthy note and building outward without second-guessing it every ten seconds.
One clear reference pitch is enough to train the whole instrument, and your ear along with it.
A simple anchor routine
Use this routine when you practice:
- Choose one string and one reference source.
- Listen to the reference more than once before touching the tuning peg.
- Sing or hum the pitch to yourself if that helps you hold it in memory for a moment.
- Adjust the string in small turns until the two notes settle together.
- Check it again after a short pause so you know you matched the pitch, not just the moment.
The trade-off is simple. Rushing saves a few seconds and usually gives you a shaky foundation. Spending real attention on the first note makes the rest of the process faster, calmer, and more accurate.
This is also where many players first feel the shift from tuner dependence to actual listening. Once you can grab one good note and trust your ear to match it, the guitar starts to feel less like a machine you service and more like an instrument you can hear your way around.
Core Methods for Relative Guitar Tuning
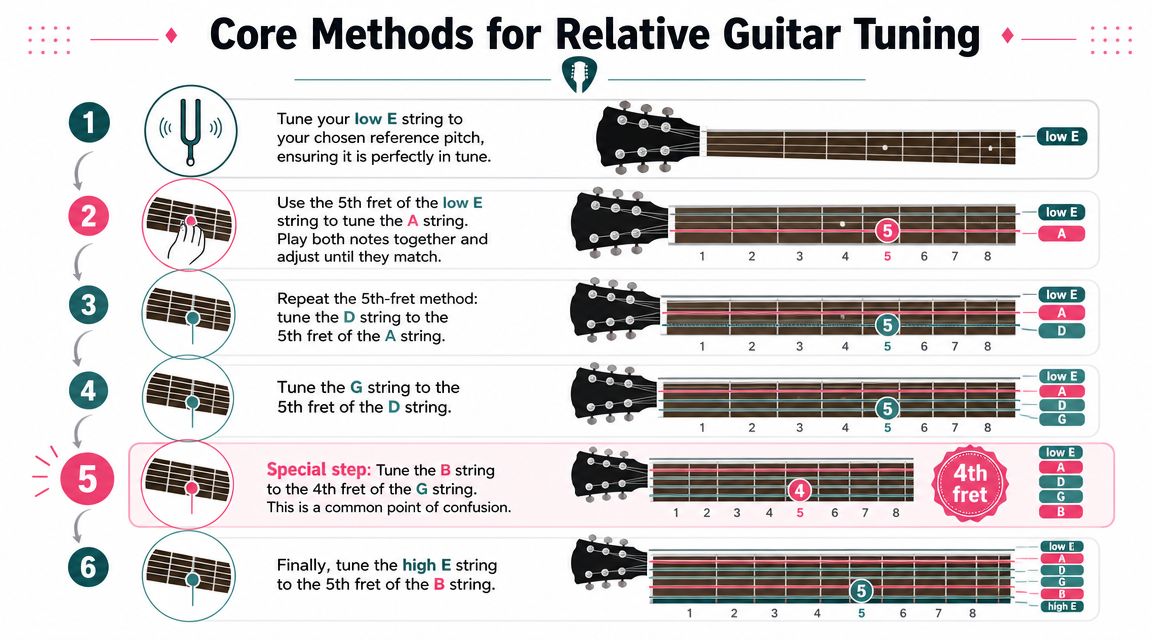
The most reliable way to tune a guitar by ear is simple in principle. First, anchor one string to a trusted reference. Then tune the other strings in a fixed order.
That workflow is laid out clearly in Musical U’s guide to tuning your guitar by ear, which recommends a sequence built around unison matches across the neck, including the familiar checkpoints from the 6th string through the 2nd string and the important 4th-fret exception when tuning the G string to the B string.
Why one correct note matters more than six guesses
If your low string is right, the next five strings can be matched from it.
If your low string is wrong, you can still end up with a guitar that sounds fine alone and bad with everyone else.
That’s why relative tuning works best when it starts from a real anchor, not from memory you don’t fully trust.
A visual walkthrough helps if this is still new:
The classic 5th fret method
This is the method most players learn first because it’s direct and easy to remember.
Use your tuned reference string, then work across the guitar like this:
- Tune the 5th string to the 5th fret of the 6th string.
- Tune the 4th string to the 5th fret of the 5th string.
- Tune the 3rd string to the 5th fret of the 4th string.
- Tune the 2nd string to the 4th fret of the 3rd string.
- Tune the 1st string to the 5th fret of the 2nd string.
That 4th-fret move between G and B is the spot people forget. Miss it, and the whole top of the guitar ends up skewed.
When you compare the fretted note to the open string, play them back and forth or let them ring closely together. Your job is to hear whether they fuse into one sound or rub against each other.
For players working on broader listening skills, this also pairs naturally with interval practice. A guide like this one on music intervals helps connect fretboard mechanics to what your ear is learning.
A video example can make the sequence easier to absorb on first pass.

Harmonics and the wobble that tells the truth
Harmonics can make fine tuning easier because they expose the mismatch more clearly.
When two strings are close but not exactly aligned, you’ll hear a pulse or wobble. That audible beating slows down as the pitches get closer and disappears when they match. This is one of the most useful things a beginner can learn to hear.
Some recent teaching also points out an important trade-off. Harmonics can be easier in a quiet room because the shimmer between slightly mismatched notes stands out. The fretted method is simpler conceptually and often quicker for players who struggle to sound clean harmonics or need a practical stage method (discussion of harmonics, fretted tuning, and hybrid workflows).
When the wobble disappears, stop turning. That calm, settled sound is the target.
Tuning methods compared
| Method | Pros | Cons | Best For |
|---|---|---|---|
| 5th fret | Simple, easy to memorize, works on any guitar without extra technique | Harder to judge small differences if your ear is still developing | Beginners, quick retunes, louder environments |
| Harmonics | The beating is often easier to hear, can feel more precise | Clean harmonics take practice, background noise can hide the shimmer | Quiet practice, careful listening, players building finer pitch awareness |
A lot of players do better with a hybrid approach than with loyalty to one method. They anchor one string, use the 5th-fret method to move across the guitar, then use harmonics or octave checks to catch small mistakes.
That’s a musical approach, not a rigid one.
How to Actually Hear Pitches Correctly
Knowing the steps isn’t the same as hearing them well.
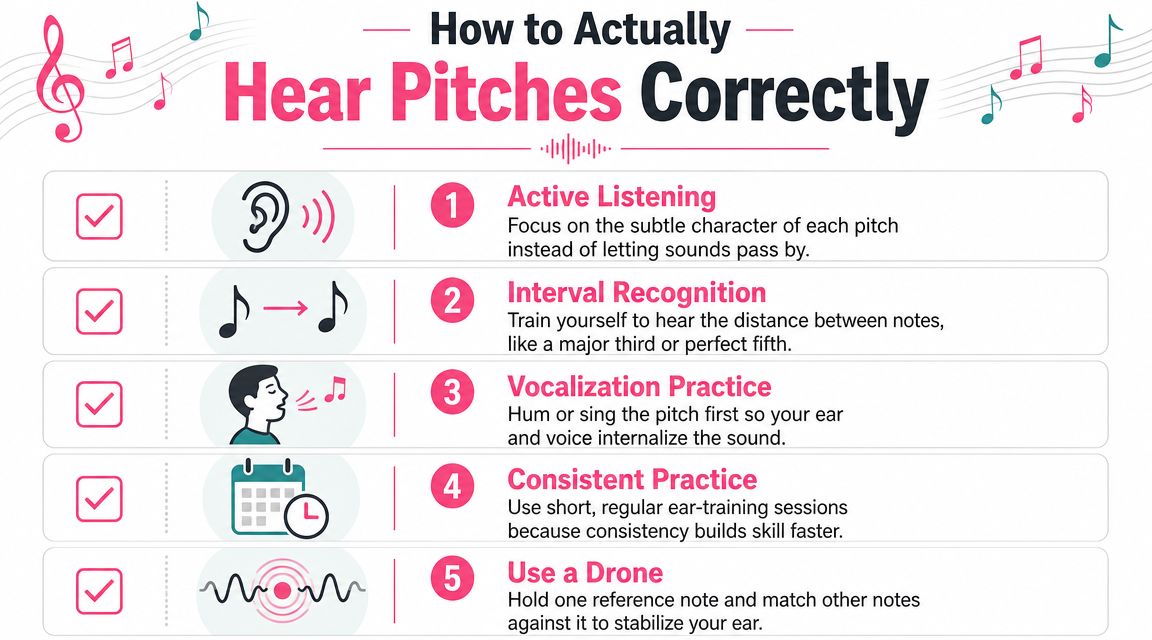
Most tuning problems come from listening passively. A player plucks, turns, plucks again, and hopes the guitar lands in the right place. That feels random because it is random. The ear needs a job that’s specific.
What in-tune actually sounds like
Two matching pitches sound stable. They stop fighting.
Two almost-matching pitches produce friction. Depending on how close they are, that friction may sound like wavering, pulsing, shimmer, roughness, or a restless “wah-wah” movement. Beginners often think they’re listening for the note name. They’re usually better off listening for whether the sound is calm or unsettled.
If you’re new to this, mute extra strings and pluck more gently than you think you need to. Too much ringing from other strings muddies the comparison.
A clean attack helps. A quiet room helps more.
Don’t ask, “What note is this?” Ask, “Is the sound settling or resisting?”
Simple ear training drills that build this fast
These drills work because they connect tuning directly to ear training, not just setup.
- Hum the reference first: Play your anchor note, stop, then hum it. After that, pluck the target string and try to move it toward the pitch you just sang. This helps turn a heard note into an internal one.
- Listen for speed changes in the wobble: If two notes are close, the pulse gets slower as you approach the match. Train yourself to notice whether your last peg turn made the pulse faster or slower.
- Practice one pair of strings only: Don’t tune the whole guitar every time. Spend a few minutes with just one unison match so your ear learns that sound thoroughly.
- Use a sustained note: Let one pitch ring or repeat it while you compare the next string. Holding one sound in your ear is the beginning of playing by ear.
- Sing before you adjust: Even a rough vocal match improves pitch memory. You don’t need a polished voice. You need an active ear.
If you want more drills built specifically for guitarists, this article on ear training for guitarists gives practical exercises that connect directly to the fretboard.
One useful tool in this area is Trill: Ear Training Daily, which focuses on short daily practice for hearing notes, intervals, and chords. Used consistently, that kind of routine helps tuning stop feeling like guesswork and start feeling like recognition.
Why this improves more than tuning
When you train your ear to hear a unison clearly, you’re also training the same attention you need for:
- Bends that land in tune
- Chord recognition
- Improvisation by sound instead of shape
- Learning songs without tabs
- Building toward perfect pitch skills, or at least stronger pitch memory
That’s why 10 minutes a day matters. Not because tuning needs ten minutes, but because your ear changes when you work it daily.
Troubleshooting Common Tuning Problems
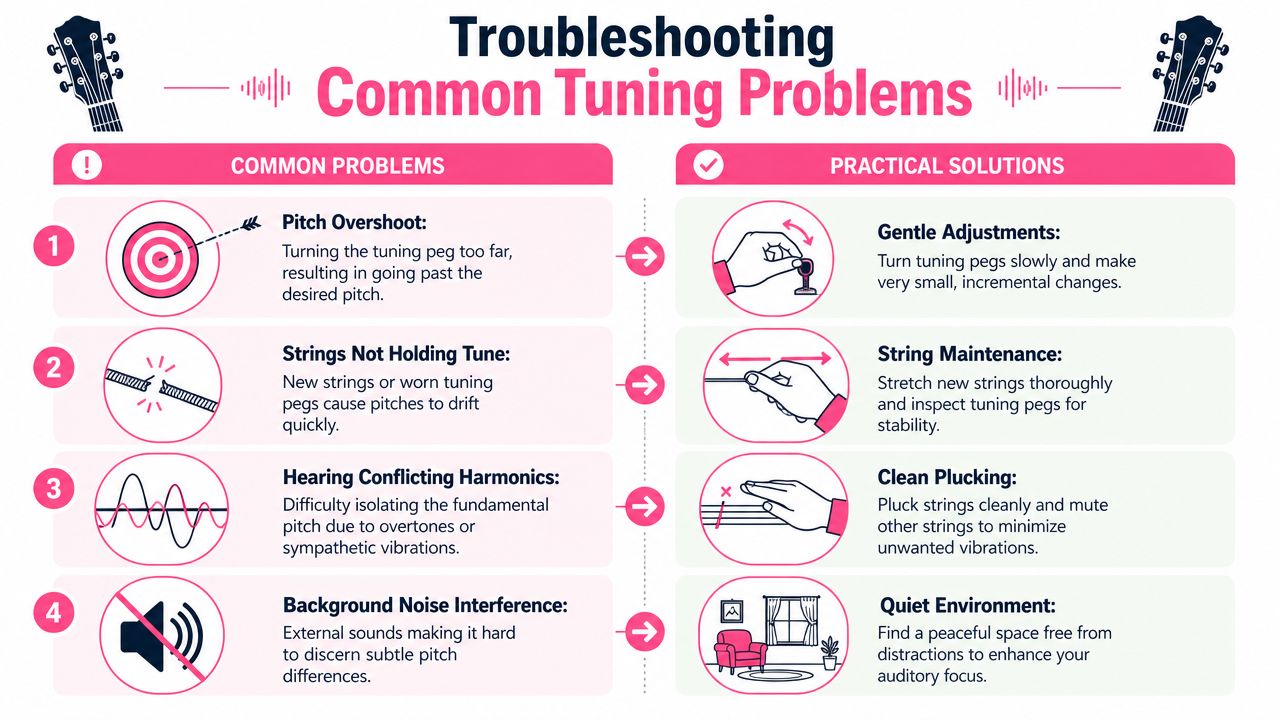
A student will often get one string close, turn the peg a touch more, and suddenly the note seems to disappear again. That moment frustrates people, but it also teaches one of the most useful listening habits in music. You are not just fixing a guitar. You are training your ear to notice direction, drift, and stability.
When the note keeps slipping past you
The most common technical problem is overshooting the pitch.
The fix is simple. Always approach the note from below. If you go sharp, do not nudge backward a hair and hope it settles. Drop the string clearly below the target, then bring it back up in small turns. The string usually holds better that way, and your ear gets a cleaner chance to judge when the beating slows and disappears.
A few habits make this easier right away:
- Turn the peg less than you think: Fine control beats fast correction.
- Pluck while turning: Hear the change as it happens.
- Pause for a second: Let the pitch settle before judging it.
- Check the match twice: First for closeness, then for true unison.
Small peg turns build better ears. Large turns create confusion.
When the guitar is tuned to itself but still sounds wrong
This usually points to a bad starting reference. The strings may agree with each other and still be out with the piano, the track, or the other guitarist in the room. Relative tuning only stays accurate if the first note was accurate.
There is also a physical side to this. Sometimes the ear is doing fine and the instrument is the problem.
| Problem | What it feels like | What to do |
|---|---|---|
| Old strings | Notes sound dull, drift, and refuse to settle | Change them before judging your ear |
| New strings | The pitch drops again right after tuning | Stretch them gently, then retune a few times |
| Extra string noise | Two or three pitches blur together | Mute unused strings with both hands |
| Noisy room | The wobble between notes is hard to hear | Tune somewhere quieter or use the simpler fretted method |
One more trade-off matters here. Fast tuning is useful on stage or in rehearsal, but slow tuning is better for ear training. If the goal is to build listening skill, take the extra few seconds and really hear whether the notes are pulling against each other or sitting still together.
The mental problem shows up just as often. Players say they cannot hear it. In lessons, that usually means they cannot hold attention on the sound long enough yet. That is a trainable skill.
Start smaller. Tune one pair of notes. Miss it, correct it, and listen again. After a while, the sound of a true match stops feeling mysterious. That is the payoff of learning to tune by ear. You begin to trust what you hear, and that trust carries into bends, chords, song learning, and playing without constantly checking a screen.
Your Daily Practice for Musical Freedom
Tuning by ear isn’t the finish line. It’s the doorway.
When you can tune a guitar by ear, you’ve started building the habit that supports everything else musicians want. You hear relationships instead of isolated notes. You trust your listening more. You stop waiting for visual confirmation before making a musical choice.
That change carries into real playing fast. You start catching wrong notes sooner. You start hearing chord movement more clearly. You get less dependent on tabs, charts, and guesswork. That’s what people usually mean when they talk about wanting to play by ear. They want more direct contact with sound.
A practical routine works better than occasional long sessions. Give this 10 minutes a day:
- Set one reference note
- Tune two or three strings by ear
- Repeat one hard match until it feels clearer
- Hum the target before adjusting
- End by checking a simple chord and listening for stability
Do that daily and your ear starts organizing sound differently. Not overnight. But steadily.
The freedom is real. You pick up a guitar and don’t feel helpless without a tuner. You join other musicians and adjust quickly. You hear more of what’s happening. You respond instead of guessing.
If you want a structured way to build that habit, Trill: Ear Training Daily gives you short daily ear training practice for notes, intervals, chords, and playing by ear, so the listening skills behind tuning keep improving every day.