Master Notes on Staff: Play with Freedom
You sit down with sheet music, find a note, name it correctly, and still can’t play the phrase smoothly. That’s one of the most common frustrations in music learning.
The problem usually isn’t that you’re bad at reading. It’s that reading hasn’t connected to hearing yet.
A page of notation is only useful when it helps you imagine sound, find it on your instrument, and respond fast enough to make real music. That’s why learning notes on staff shouldn’t stop at memorizing line names and space names. The deeper skill is learning to look at the page and hear direction, distance, tension, and shape.
That skill is trainable. It isn’t reserved for people with perfect pitch, and it isn’t some mystery talent you either have or don’t have. If you practice connecting what you see to what you hear, a little every day, your ear gets stronger and your playing gets freer.
Table of Contents
- Stop Reading Music and Start Hearing It
- The Staff Is a Map for Your Ears
- Finding Your Bearings with Clefs and Anchor Notes
- Exploring Beyond the Map with Ledger Lines and Accidentals
- The Real Skill From Note Naming to Pattern Recognition
- Daily Exercises to Connect Your Eyes and Ears
Stop Reading Music and Start Hearing It
Many players treat notation like a decoding test. They stare at the page, translate each symbol into a letter name, then hunt for that note on the instrument. It works, but it’s slow. Under pressure, it falls apart.
Music doesn’t happen one note name at a time. It happens as motion, shape, and sound. A melody rises. A chord lands. A phrase leans somewhere and resolves. If your reading never reaches that level, sheet music stays mechanical.
Practical rule: Don’t ask only, “What note is this?” Also ask, “What does this note sound like compared to the one before it?”
That one question changes everything. It shifts your focus from labels to relationships. And relationships are what your ear can learn.
When you read notes on staff well, you don’t just identify symbols. You begin to predict sound. You see a note jump upward and expect a higher pitch. You see notes packed closely together and expect stepwise motion. You see a familiar chord shape and your hands start to know where to go.
That’s also why ear training matters so much here. Reading and hearing shouldn’t live in separate boxes. If you only read, you become dependent on symbols. If you only guess by ear, you can miss structure. But when the page and your ear support each other, you start to play by ear with much more confidence.
A lot of beginners think this depends on talent. It doesn’t. Your ear improves the same way rhythm improves, or finger control improves. You train it. You repeat. You listen closely. You correct.
And if you stick with short daily work, even 10 minutes a day, the staff stops feeling like a wall and starts feeling like a guide.
The Staff Is a Map for Your Ears
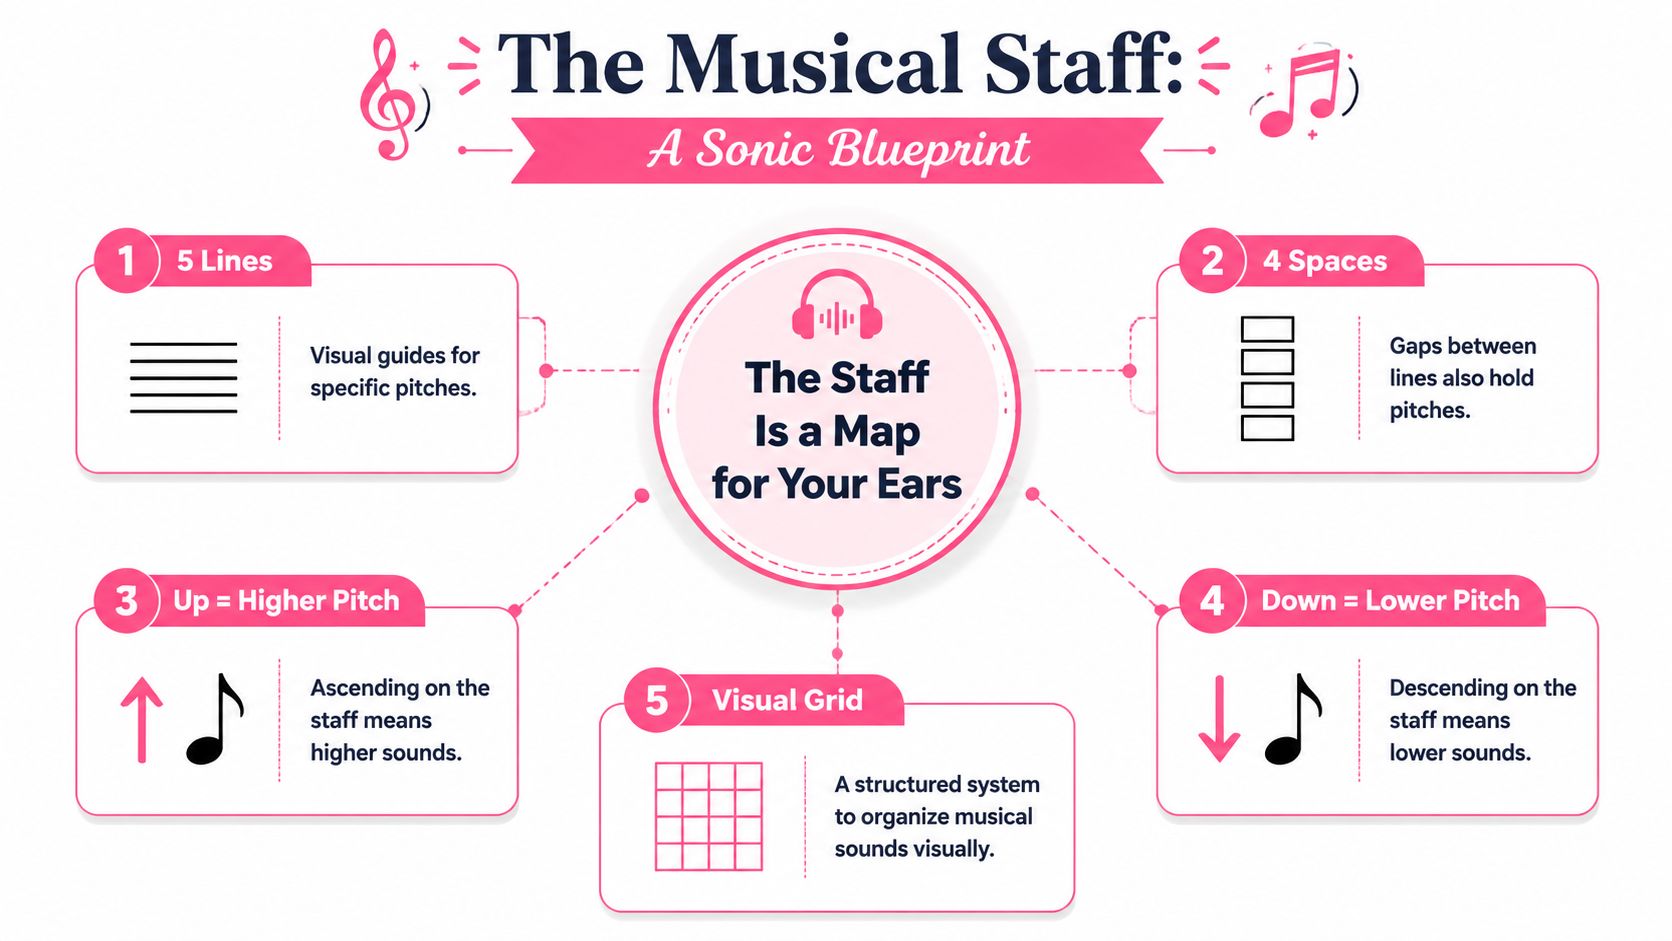
Sit at the piano or pick up your instrument and look at a short melody before you play it. You can often tell whether it will rise, fall, or hover around the same area just by the shape on the page. That is the primary job of the staff. It turns pitch into something your eyes can follow so your ears can prepare.
The staff is a visual system for organizing sound. It uses five horizontal lines, and the note letters A through G repeat as music moves higher or lower. Instead of treating every pitch like an isolated fact, you learn where sounds live in relation to each other. Reading gets easier when the page starts to feel less like a spelling test and more like a map.
Why the staff helps your ear
A staircase is a useful comparison here. Notes placed higher on the page usually sound higher. Notes placed lower usually sound lower. Each line and each space is one more step, so your eyes can track musical motion before your fingers touch the instrument.
That matters because music is heard as movement. If a melody climbs one note at a time, your ear hears a gentle rise. If it skips farther, your ear hears a leap. The staff shows both kinds of motion clearly, which is why strong readers are rarely decoding one note at a time. They are noticing direction, distance, and shape.
Written music developed over time because musicians needed a reliable way to preserve and teach sound. If you are curious about how other staff systems work beyond treble and bass, this short guide on how to read tenor clef shows the same mapping idea in a different range.
How to read motion before note names
Start with the simplest question your ear can answer: did the melody go up, down, or stay the same?
That question trains a skill many beginners skip. A child can hear that one note is higher than another long before they can name either note. You can use that same instinct while reading. When your eyes notice contour first, note names become more meaningful because they are attached to a sound you already expect.
Try this with any easy phrase:
- Follow the contour: Trace the notes with your eyes and notice whether the line rises, falls, or repeats.
- Hum the shape: You do not need exact pitches. Just match the direction of the melody with your voice.
- Play and compare: Check whether the sound matched what you predicted from the page.
One good habit changes a lot. Look for shape first, then detail.
| Visual on the staff | What you’re likely to hear |
|---|---|
| Notes moving upward | Pitch rising |
| Notes moving downward | Pitch falling |
| Notes packed close together | Stepwise motion |
| Notes spaced farther apart | A bigger leap |
Over time, this turns note reading into listening practice. You stop seeing the staff as five lines with rules attached. You start seeing it as a picture of sound, and that is what gives you more freedom at the instrument.
Finding Your Bearings with Clefs and Anchor Notes
You sit at the piano, open a page of music, and see a note on the staff. The first question is not “What mnemonic matches this line?” The useful question is “Where am I, and what should this sound like?”
That is what clefs and anchor notes help you answer.
What a clef actually does
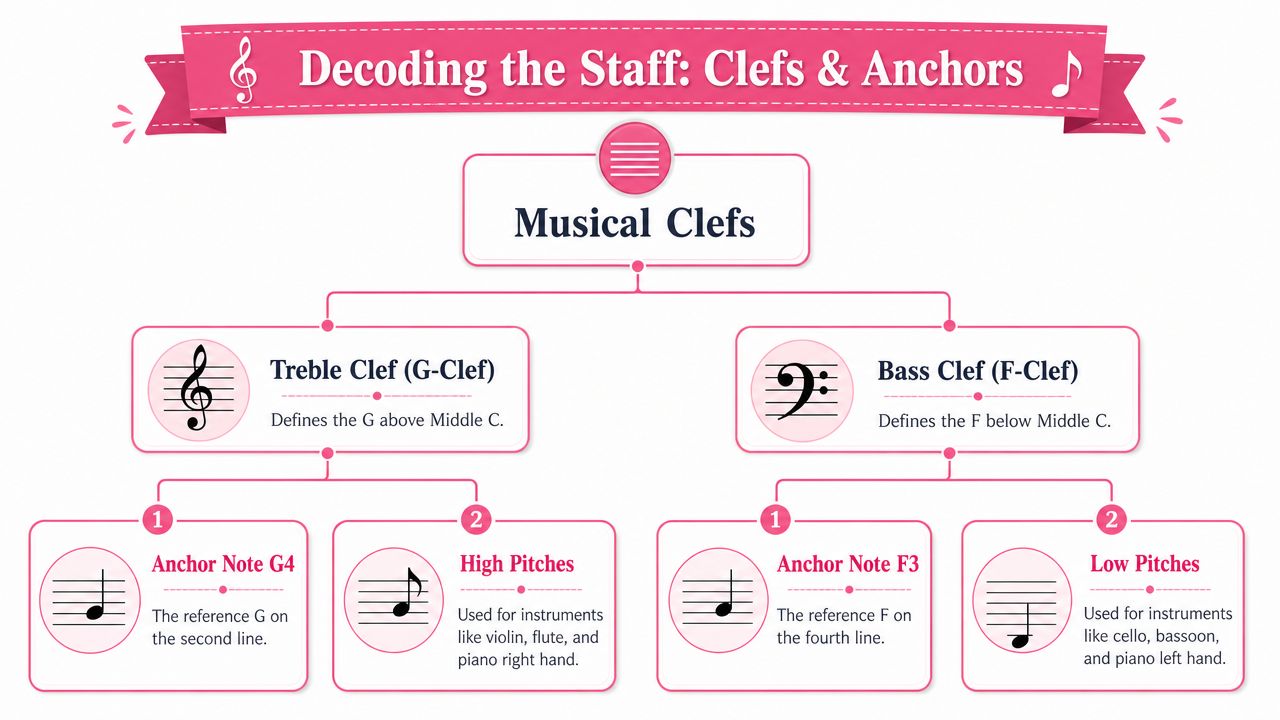
A staff needs a starting point. The clef provides it by assigning one exact pitch to one exact line. Once you know that one location, the rest of the notes fall into place by step and skip.
You can treat a clef like the “You are here” dot on a mall map. Without that marker, the map is just lines and shapes. With it, you can judge distance and direction.
For most beginners, the two clefs that matter first are:
- Treble clef: Used for higher notes
- Bass clef: Used for lower notes
You may later see other clefs in choral, string, or orchestral music. If you want to see the same idea applied to a different range, this guide on how to read tenor clef shows how the reference point shifts while the logic stays the same.
Why anchor notes work better than memorized phrases
Mnemonic phrases can help you get started. They give you a temporary handle on the staff.
But fluent reading comes from recognition, not reciting.
A strong reader does not mentally chant a sentence for every note any more than a fluent reader sounds out every letter in a simple word. Instead, they spot a familiar point and read outward from it. In music, those familiar points are anchor notes.
Three useful anchors are:
- Treble G: The note the treble clef curls around
- Bass F: The line marked by the two bass clef dots
- Middle C: A landmark that connects the upper and lower staves
Learn these thoroughly. Hear them in your mind. Find them quickly on your instrument.
That approach gives you speed, but it also gives you sound. If treble G is not just a symbol to you, but a pitch you can sing or expect, then nearby notes stop feeling random. They become places near a sound you already know.
How to read from an anchor in real time
Suppose you see a note in treble clef and do not know its name right away. Start with the nearest anchor, not with panic.
Ask yourself:
-
Which anchor is closest?
Is it near treble G or middle C? -
How far away is it?
One step, one skip, or more? -
What should that distance sound like?
A step usually feels close and smooth. A skip feels wider. -
Can I check it with my voice or instrument?
Hum first if you can. Then play.
This is the point where reading starts to support playing by ear. Your eyes see location, your ear predicts sound, and your hands confirm it. The staff stops being a spelling test and starts working like a map you can hear.
A common beginner question is whether this requires perfect pitch. It does not. Relative pitch matters more here. You are learning to hear how one note relates to a known note, which is the skill you use in actual music.
Try a small daily drill. Find treble G, bass F, and middle C on the page. Sing each one, then play it. After that, choose one nearby note and name it by distance from the anchor. A few minutes of that each day builds much stronger reading than memorizing long phrases in isolation.
Exploring Beyond the Map with Ledger Lines and Accidentals
Once you understand the basic staff, you’ll meet notes that sit above or below it. These aren’t exceptions. They follow the same logic.
Ledger lines are just more staff
A ledger line is a short extra line added for notes beyond the main five lines. Educational materials often point out that musicians keep counting with ledger lines rather than switching to a new system. That consistency matters because it means the staff keeps extending without changing its logic.
Picture it as adding extra floors above a building or a basement below it. The pattern doesn’t restart. It continues.
If you’re reading notes on staff and see ledger lines, stay calm and count the same way you already do:
- Keep the alphabet moving: A to G, then back to A.
- Count lines and spaces normally: The extension follows the same sequence.
- Look for nearby anchors: Don’t treat ledger notes as completely separate territory.
The biggest mistake is treating ledger lines as scary new content. They’re just more of the same map.
Accidentals are sound instructions
Sharps, flats, and naturals matter because they change what you hear, not just what you see.
- Sharp: Raise the pitch.
- Flat: Lower the pitch.
- Natural: Return to the basic note name after a previous change.
A simple exercise works well here. Play a C. Then play C-sharp. Listen to the lift in sound. Then play C again and then C-flat if your instrument layout allows you to hear that lowering clearly in context. Don’t rush this. The point is to hear the adjustment.
If a symbol changes the pitch, your ear should notice the change before your theory brain explains it.
That habit helps with sight-reading, improvisation, and playing by ear. Accidentals stop feeling like symbols to memorize and start feeling like small but meaningful sound shifts.
The Real Skill From Note Naming to Pattern Recognition
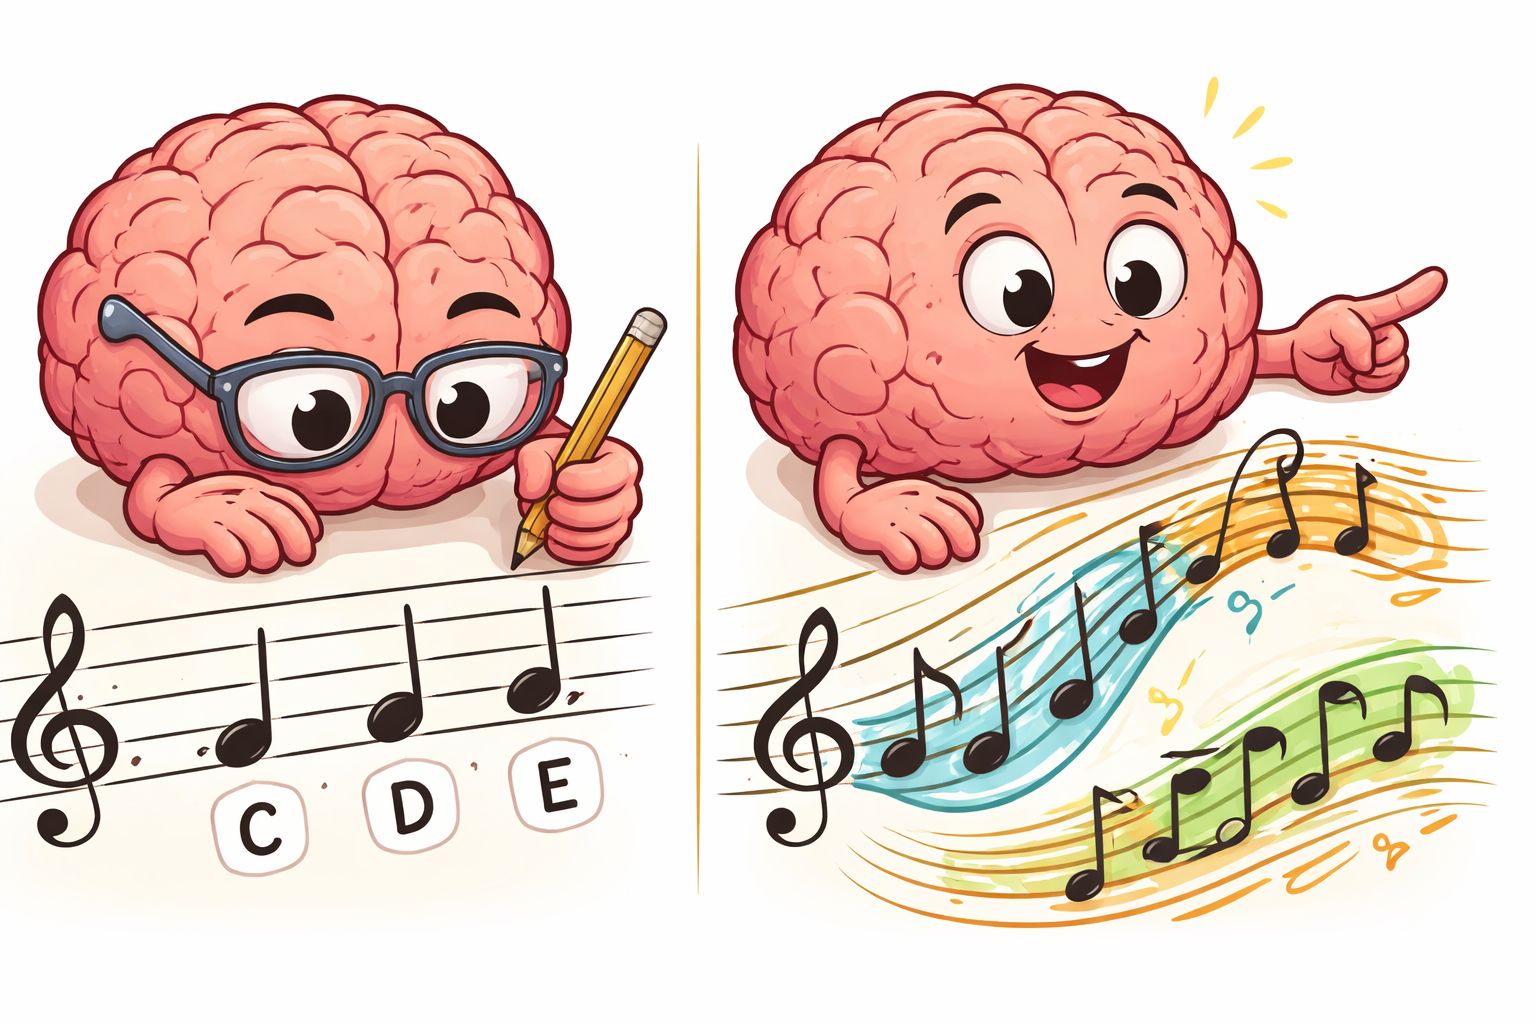
You sit down with a simple melody, and the first note is easy. By the fourth or fifth note, your eyes are still naming letters while the beat keeps going. That is the moment many students realize note naming alone is not enough.
Why note naming feels slow
Naming notes is a useful starting point. It gives you landmarks. But fluent reading depends on seeing relationships between notes and hearing those relationships in your mind before you play.
Open Music Theory explains this well in its chapter on notation, clefs, and ledger lines. Students often learn where notes sit on the staff, yet still have trouble turning those symbols into music in real time. The missing step is pattern recognition.
Reading music works a lot like reading language. A beginner may sound out each letter. A skilled reader recognizes whole words and phrases. Music works the same way. Strong readers stop treating every note as a separate puzzle and start noticing motion, distance, and shape.
That shift matters for your ears as much as your eyes.
Read shapes as sound
When notes rise one step at a time, you should hear a smooth climb. When they skip, you should expect a larger change in sound. When several notes form a stack, your ear should prepare for a chord quality, even before your fingers arrive.
A fluent player starts to notice patterns like these:
- Stepwise motion: A smooth walk up or down.
- Skips: A wider jump that changes the color of the line.
- Chord shapes: Notes grouped in a familiar vertical pattern.
- Arpeggios: Chord tones spread out over time.
If you want extra written practice, this music note name worksheet for note reading drills can help. Use it as a starting point, then sing or play every pattern so the page connects to sound.
Here’s the difference in practice:
| Slower habit | Stronger habit |
|---|---|
| Name each note one by one | Notice contour and interval size |
| Hunt for each key separately | Feel the hand movement as a group |
| Rely only on memory sayings | Use anchor notes, then read outward |
| Watch the page silently | Hear the pattern inwardly before playing |
Before the next example, listen for shape. Ask yourself whether the line moves by steps, leaps, or chord tones.

How this strengthens playing by ear
Notation starts to feel less like a codebook and more like a map. A rising third on the page is not only two note names. It is a sound you can learn to expect, sing, and find on your instrument.
That is why interval reading helps so much. Instead of asking, “What are these two notes called?” ask, “How far apart do they sound?” Your eye sees the gap. Your ear learns the distance. Your hand starts to trust both.
Try this with any short melody:
- Scan the contour. Notice whether the line mostly walks or jumps.
- Sing it loosely first. Aim for the shape, not perfection.
- Play it and listen back. Compare what you predicted with what you heard.
- Repeat right away. Fast feedback helps your ear adjust.
Do this daily, even for two minutes.
Over time, common patterns stop feeling random. You begin to recognize them the way you recognize a familiar voice on the phone. That is a big step toward musical freedom, because your hands no longer wait for note names alone. They start responding to heard patterns, and that is the skill that supports sight-reading, memorization, improvisation, and playing by ear.
Daily Exercises to Connect Your Eyes and Ears
You sit down to practice, look at a few notes on the staff, and your fingers wait for your brain to name each one. That feels slow because it is slow. The goal of daily work is to help the page trigger a sound in your mind first, so your voice or hands can respond with less hesitation.
Short practice works well here because ear and eye connection grows from repeated contact. A few focused minutes each day teaches your brain, “this shape sounds like this,” the same way daily listening helps you recognize a friend’s voice after only a word or two.
Try this simple routine:
-
Match one note to one sound
Point to a single written note. Play it on your instrument, then sing it back. You are linking three things at once: the spot on the staff, the sound you hear, and the physical motion it takes to produce it. -
Compare two notes
Choose any pair of notes and ask one question before playing: does the sound move a little or a lot? Then play them and check. This trains your ear to hear distance, which matters more in real music than reciting two note names in isolation. -
Hear a short pattern first
Look at a tiny melody and sing or hum it before you touch the instrument. If your prediction is wrong, that still helps. You are practicing musical guess-and-check, and that is how inner hearing gets stronger.
For singers, this connects closely with classic sight singing exercises, because the page only becomes useful when you can hear it internally before anyone gives you the answer.
If you use a practice tool such as Trill: Ear Training Daily, keep the focus simple. Listen, sing, check, repeat. The app can supply quick prompts and feedback, but the primary goal is to teach your ear to treat the staff like a map, not a spelling test.
One small rule helps a lot. Stop while your attention is still fresh, and come back tomorrow.
That is how notation turns into sound you can predict, and sound you can predict turns into freer playing.